
Pool liner repair or replacement is one of those tasks that pool owners would rather avoid. It’s almost always stressful and can be a difficult and expensive exercise, especially when you hire someone to do it for you.
Although, vinyl pool liners have a short lifespan (under 10 years) compared to other types of pool lining, they are still the least expensive option by many orders of magnitude. Renovating a plaster, aggregate or tile pool is very expensive and you cannot do it yourself.
However, pool liner repair or replacement is a task that you can complete yourself and save money. The average inground pool liner costs $3,000 to $4,000 including installation. Whereas, the average above ground pool liner costs $500.
Table of Contents
What is a Pool Liner?
A pool liner is a containment method to hold water in a swimming pool frame. This is the cheapest and easiest method to construct a swimming pool. The walls may be metal sheets and posts as in an above ground pool or a concrete shell as in an inground pool.
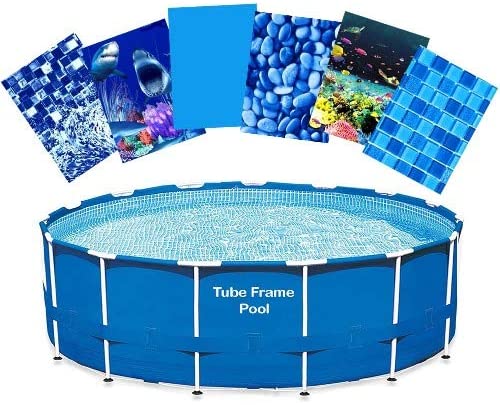
The liner is made from 20 to 30-gauge vinyl which has been molded into a swimming pool shape. Most vinyl liners are round, oval or rectangular shape.
The top of the liner is held in position by metal rails that fit over the top of the pool wall. Each manufacturer has a slightly different mechanism to hold the liner in place.

There are three types of liner locking mechanisms.
- Overlap pool liners are simply where the liner is laid over the edge and held in place with strips of plastic.
- Beaded pool liners fit into a metal track that is installed around the top of the pool.
- Universal bead liners have a j-shaped connector that hooks over the edge of the pool. These are easy to install and come in many patterns to match your pool surrounds.
An average above ground pool liner costs from $400 to over $1,000 depending on the size and shape. Installation will cost more than the cost of the liner.
Pool liners in above ground pools usually last 5 to 10 years depending on usage and maintenance. Emptying your pool every year and storing the liner in a container over winter will make it last longer.
How to Detect a Leak in Your Pool
When your pool is losing water and you need to refill with the garden hose you probably have a leak. All swimming pools lose water to evaporation especially in summer. However, if your pool water is dropping more than usual and you are having to add water all the time you probably have a leak that needs investigation and repair.
If you have an above ground pool, check around the perimeter of your pool for any damp spots or puddles of water forming beside the pool.
If you have an inground pool, do you notice any change in the level of soil, grass, paving or other surface around the pool that would be caused by the ground underneath washing away.
The simplest way to test for a leak is to add some vegetable dye (or food coloring) to the water and see if it is sucked away into a hole or crack. Place some drops of dye all around the sides and watch if it is sucked away.
Common places for pool leaks are around the skimmer box, pool light and the hydrostatic valve (inground pool only).
Once you have detected a leak you need to repair it as soon as possible to prevent it becoming worse and losing more water.
If you cannot find a leak maybe your pool has excessive water evaporation.
Please read our article on How to Prevent Pool Water Evaporation
Why Repair a Leaky Pool?
Apart from losing water and having to refill your pool with the garden hose there are many other reasons to repair a leaking pool.
Excessive water leakage can get under the pool causing the ground to swell lifting the pool upwards. This motion can cause damage to an inground pool and the surroundings. The underground plumbing connections to the pool can be damaged. The pipes from the skimmer box to the pump may be cracked and develop leaks. The return pipes from the filter to the pool outlet jets may be damaged causing additional leaks.
Water can damage your pool surroundings such as paving, paths and other landscaping. Your pathways may sink due to the ground underneath washing away. Depressions may appear in the lawn where flowing water has washed away soil underneath.
Water leaks can cause posts (both metal and wood) to rot or rust. Eventually, you would need to replace the damaged posts.
Leaks can damage timber decks that lay on the ground as they absorb to much moisture from the damp ground beneath.
Water may even run into neighboring properties causing excessive dampness and damage to your neighbor’s landscaping.
How to Patch a Vinyl Pool Liner
If your pool liner has developed a hole or tear it can easily be repaired with a vinyl patch repair kit.
Obviously, it’s easiest to repair the liner when the pool is empty but liners can be repaired when the pool is full of water.
Peel and Stick Vinyl Plastic Pool Patch
These ready to use peel & stick style pool patches are the easiest and least expensive option to patch a pool liner. They work best for dry use when the pool is empty but many brands work well underwater making draining the pool unnecessary.
- Ensure you clean the area of damage with a cleaning cloth.
- Rub the area with some wet & dry paper to roughen the surface to help adhesion.
- Cut the repair patch about 3/4 inch (2cm) larger than the repair area.
- Cut the patch into a rounded shape with no corners that can fold over.
- Place the patch underwater and remove the paper back.
- Quickly place the patch over the repair area and apply pressure to the patch.
- Ensure you squeeze out all water and air bubbles to make a perfect bond.
- Do not touch the patch for at least thirty minutes for a strong bond.
These pool patches cost from around $10.
Underwater Vinyl Pool Patch Kit
When you want to repair your liner underwater, I recommend using a pool patch kit with waterproof adhesive. This guarantees a better result than the cheaper peel & stick products.
- Ensure you clean the area to be patched with a cleaning cloth.
- Rub the area with some wet & dry paper to roughen the surface to help adhesion.
- Cut the repair patch about 3/4 inch (2cm) larger than the repair area.
- Cut the patch into a rounded shape with no corners that can fold over.
- Apply the adhesive to the patch
- Gently fold the patch in half and immerse it into the pool water.
- At the repair site, unfold the patch and immediately apply to the liner.
- Firmly press the patch into place. Squeeze out all water and bubbles.
- The patch will take several days to fully cure and permanently bond to the liner.
These adhesive pool patch kits cost from around $20 to $30.
How to Remove Vinyl Liner Stains
Vinyl liner pools are fairly stain-resistant and generally stay clean without too much effort.
However, vinyl liners can develop stains.
Spot Cleaning
When you have one or a few small stains you can spot clean the liner.
There are many products available to clean vinyl liners.
Whole Pool Treatment
Most of these pool cleaners are simply poured into the pool water and allowed to circulate with the pump. They dissolve stains on the vinyl liner but the dosage depends on the type and difficulty of the stain. You may need to brush the stain to finally remove it.
Some use harsh chemicals while others use natural citrus-based products to remove stains.
They remove mineral stains caused by copper, iron and magnesium.
When these minerals oxidize, they change color and leave a stain when the mineral settles on the liner. Iron becomes dark red-brown; copper turns purple-black; and magnesium becomes pink-purple.
How to Set a Vinyl Liner Back into the Track
Pool liners expand and contract with changes in temperature through summer and winter. Sometimes the pool liner can pull out of the track at the top of the pool.
When the liner is loose fitting, you can simply pull up the liner and refit it back into the track. Re attach the liner holders and the problem is fixed.
However, when the liner is hard and a tight fitting you won’t be able to easily refit the liner back into the track. You will need to apply heat to the liner to make it easier to stretch and move into the correct place.
To make it easier on yourself, try to do this in the summer when the heat makes it easier to stretch the liner.
- Reduce the level of water in the pool. The lower the better. In some circumstances you may need to empty the pool completely to enable the liner to be stretched and replaced correctly.
- Apply heat to the top part of the liner with a hair dryer or heat gun. Be careful not to apply too much heat as the liner may begin to melt.
- Slowly pouring hot water onto the top part of the liner also works well to loosen the liner and make it easier to stretch. Don’t pour the hot water on the very top of the liner otherwise you will not be able to handle the liner. Get another person to pull up the liner as you pour hot water up and down that section of liner.
- Pull up the liner to make enough overlap with the track.
- Push the liner into the track and secure it with the locking mechanism.
Pool Liner Removal
Above Ground Pool
Pool liner removal is easy!
Small holes and tears in your vinyl liner can be successfully patched and even double patched. However, larger tears are more difficult to repair and tend to tear further even after a repair. If the liner is old and has developed several tears or holes it is usually a better option to replace the liner.
Replacing your above ground pool liner is easier than most people think when you have some basic instructions.
Try replacing the liner in the spring or fall when the temperature keeps the liner soft and flexible but not too hot as in the middle of summer. I don’t recommend replacing liners in the middle of winter as the liner is hard and less flexible making it difficult to install.
Organize at least two people to work on the task as it be easier to handle and stretch the liner across the pool.
Drain & Prepare the Pool
- Drain all the water from the pool. The easiest option is to purchase a submersible pool pump which cost from $50. Don’t rent a pump as it will cost over half the price to buy one. Siphoning the pool works but is very slow and best left overnight. It is difficult to siphon the last few inches from the pool whereas a pump will do that.
Please read our article How to Drain a Swimming Pool
- Remove all pool accessories and the skimmer box.
- Detach the old liner from the top of the pool and carefully remove the old liner. Some pool owners repurpose the old pool liner into a pool cover, boat cover or roof storm cover.
- Prepare the ground under the pool with sand as directed by the liner manufacturer.
Pool Liner Replacement
Install the New Liner
- Install the new vinyl liner. It’s better to do this in warm weather in the middle of the day when the liner will be more malleable. Smooth out wrinkles from the center to the edges.
- Some people like to add wall foam, which is glued or sprayed on the walls, to give the pool walls a soft feel.
- Attach the liner to the top of the wall. Lift one side the liner over the pool wall and use the clips to hold it in place. Some pools use a beading system where you slide the liner into a track on top of the wall to hold it in place. Usually it’s best to clip one side first, then the opposite side, then another side and opposite again until you have been around the whole pool filling in each gap and opposite gap. This method ensures you evenly stretch out and clip the liner removing all wrinkles in the process.
- Smooth out wrinkles up the walls of the liner to the top. Some people prefer to use a wet & dry vacuum cleaner to suck the air from between the liner and wall to remove wrinkles. However, a simple plunger can also work well.
Please read our article How to Install a Liner in an Above Ground Pool
Refill the Pool
- Begin filling the pool. Ensure no wrinkles form on the bottom as these are the most difficult to remove. Wrinkles on the walls can easily be worked up the wall towards the top even when the pool is full of water.
- Refit the skimmer box and connect to the filtration system.
- Fill the pool to the midway level of the skimmer box.
- Once the pool is full balance the water chemistry and operate the filter pump.
If you have a problem with wrinkles, please refer to How to Remove Pool Liner Wrinkles
Final Thoughts
Pool liner repair or replacement doesn’t have to be a nightmare. Fixing small holes or tears is easy with an inexpensive patch kit. You can even repair tears underwater and make your liner last many more years.
However, eventually your vinyl pool liner will wear out or develop too many tears to repair. Now it’s time to replace it. If it’s an inground pool call in some pool experts for a quote.
If you have an above ground pool, I recommend replacing it yourself with the help of a friend or family member. Pool liners are cheap and easy to install in an above ground pool.